


What's your cause? Express yourself! Be it for the ALS Association, any other meaningful organization, charity or beliefs movement of choice, join the wild west ice bucket GIF challenge and create awareness. The deadline for this event is Monday 1st September at 9:00 am UTC!
1. Create a GIF of your habbo doing the Ice Bucket Challenge. notMiceElf recently did an article on GIFs, Click Here to read it!
2. Go to Habbo Stories and upload your GIF under the Chronicals Of The Wild West banner.
Remember: All entries which make reference to an real life cause will receive an ice bucket challenge badge. Entries which display content that is inappropriate or do not make reference to a meaningful real life cause will not receive a badge.
the badge :
^taken from habboquests.com if u ever decide to sign up ref krushgear LOL
notmiceelfs article! pretty informative
full article :http://www.habbo.com/articles/3346-n...mmer-school-qa for the images etc
It's that time again! No, it's not time to change your Habbo babies diapers. Sheesh. It's time for another Summer School Q+A Session with notMiceElf. We're still glowing (aha, glow… get it… yeah, you do) from the last Q+A so this one had better draw a smile on our face… and as always, you can submit a question of your own when the question submitting articles appear. So get those questions ready!
How do you make a good GIF? (question posted by shiony)
This question looked so simple at first glance and then I started thinking about how to answer it and spiraled into animation and my brain pretty much flew out of control. So thanks for giving me a minor headache before my morning coffee could kick in shiony! The idea of animation is a bit too meaty for this blog post so I'll focus more on setting up an animation and then go over a decent way of saving gif files.
First off. Animation as a process is going to be dependent on the program that you're using. Some programs don't support creating animation so if you're aim is to animate make sure the program you're using has support for it! If you're just looking to save out a static (non animated) GIF you can skip all the way to the end. I'll be using Photoshop but the process is going to be mostly the same from program to program. I would suggest finding a tutorial that breaks down the specifics for the program you're actually using though. General info only gets you so far :p Ok, on we go…
Animation:
Animation is all fake. Yep. It's an Illusion whoooo *waves hands around*. I'm sure you've been told this a thousand and one times already, but, animation is a sequence of static images with slightly different content. Each one of those static images is called a frame. When viewed in quick succession we interpret the changes from frame to frame as motion. The amount of frames we see in a second is called the frames per second (technical, I know) or fps (you gamer types are saying, "hey, that's the acronym for first person shooter!", but animators had it first, so there) but you can sort of forget this concept because with gifs the fps is more about setting a delay per frame vs a standard x frames per second.
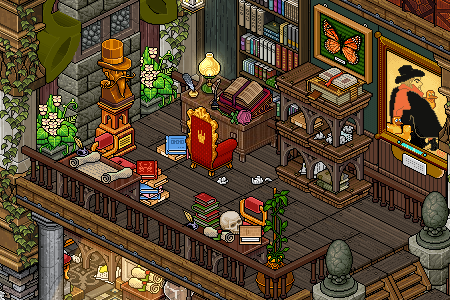
First thing we need to do is make a new file. The size doesn't really matter (stop laughing) as long as it fits what you're animating, but smaller is generally better for pixel animations. The resolution of your image, on the other hand, is something you'll have to pay attention to. Pixel art should be made using a resolution 72 pixels per inch. Don't even question it or seek an explanation for why it has to be that number. It's law. Obey.
(see image 1)
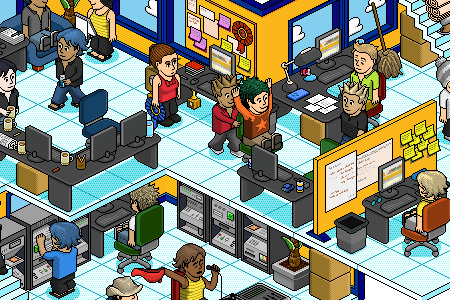
The next thing we need is an animation timeline. In Photoshop the timeline can be found under the "Window" menu and then "Timeline". In older versions of Photoshop it's listed as "Animation" instead of "Timeline".
(see image 2)
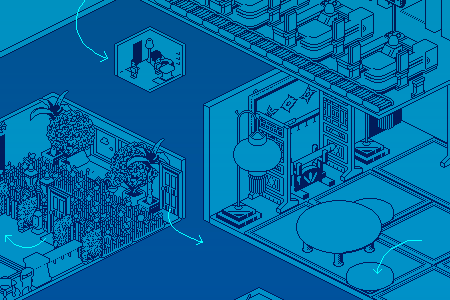
Once the Timeline is opened choose to make your animation frame based. The frame method is pretty common for other pixel animation programs and is easier to understand for beginners than the newer tween type timelines. Plus, frame based animation is classic.
(see image 3)
In order to make an animation you'll first need to draw (or have previously created) some animation frames so that you can string them together. Every frame of your animation should be a new layer in your layer palette. Whether it's pixel art or hand drawn the concepts are the same. You're aiming to draw images so that when linked together their motion has a good flow and reads clearly. This explanation is so rudimentary that it's actually making me cry a little so if you're at all interested in real animation you should find a good book (or, yah know, youtube it) on the subject. There's a set of 12 principles that Disney Animators have based their work on for ages. Well worth a look.
As a little tip, there's a simple way to test the movement between frames using a technique called "onion skinning" which lets you see several frames at once. Photoshop doesn't support this outright either. Joy. In order to get something similar to the onion skin on Photoshop you'll have to turn down the opacity of the layers under your current drawing so you can see them as you drawn new frames. In traditional animation animators used a light box to see through their drawings… and this is just an emulation of that technique.
(see image 4)
Alright, when you have your drawings ready take a look at your animation timeline. Clicking the "new frame" icon at the bottom of the animation timeline will make frames for your animation and you'll need one frame for each of your art layers. With one of the animation frames selected go to the layers palette and hide all the layers but the ones you want visible for that frame. In my example you can see that I've got a grey background layer and an art layer visible in the first frame. Hiding layers can be done by clicking small eye icon on the left of the thumbnail. Do that same process for every frame in your animation. Nothing like good old repetition to get the blood flowing…right?
(see image 5)
Modifying the "delay" for an animation frame will change how long, in milliseconds, the frame is shown for before going to the next frame. You'll need to find a delay per frame that looks smooth with your animation. Animations that are too slow will appear less seamless and show individual frames more while those that are too fast don't have enough emphasis and could suffer from frame skipping. Browsers will often forgo frame delays under a certain speed too… so it's a good idea to check your animation on a few different browsers to see that it's working the way you want it to.
(see image 6)
The loop feature will let your animation loop infinitely or by a set amount. Most gifs you'll see around the internet are infinitely looping. And that covers the animation portion. Phew. Are you still breathing? *poke poke*
Saving Your File:
Something to remember about the GIF format is that it's only an 8bit format so it has a max of 256 colors. Pixels either have color or are fully transparent (this counts as a color :p). GIF's don't have the capacity for semi transparent pixels like a 24bit image does. If you've ever tried to save GIF with more colors than the maximum allowed (like a photo) you'll see a color reduction as the colors get compressed to fit into the 8bit palette. You'll need to be considerate of that max color count when you're making images (this is where dithering and restricted palette pixel art excels!). Don't fret though because 256 colors is still pretty high.
(see image 7)
In Photoshop you're going to use the "Save for Web" option from the "File" menu and then select the GIF format. The type of palette mode (Selective, Perceptual, Adaptive, Restrictive)… really doesn't matter. Very simply, the palette mode gives preference to certain types of colors over others when reducing the colors to fit into the restricted 8bit palette. You can test them out and see which you like (we tend to use Selective for any gifs we make). Any kind of automatic dither options should be avoided for pixel art and aren't all that good anyway. If you've payed attention to your color count while you were drawing you'll never need this option anyway. Same can be said for the transparency dither. Ew. There should be bumper stickers with the phrase "Just say no to transparency dither" inscribed on them.
(see image 8)
If you're using a program that forces a gif to save using the windows palette or something other than the four listed above… drop kick that program into the trash bin and get another one. Programs that do this often auto-dither to try to approximate the look of the original palette. You'll get images that have really oddly color pixels in them when saving this way. It looks horrible. Really horrible. As in, my eyes are bleeding horrible.
(see image 9)
For the color amount, if you didn't use all 256 colors you'll only see the amount that you did use up, so don't freak if you see a lower amount. The matte option is a color that is added to semi-transparent pixels so that they become fully opaque and is mostly used to match those semi transparent colors to the color of a web page. For example, if I have a shadow that is a transparent black, a white matte color will make that color a light grey in my final image. If you choose no matte color the pixels below certain transparency will be removed while those above will be fully opaque. Realistically though, if you're making straight pixel art you should never have semi-transparent pixels.
(see image 10)
Any option for web snapping means the colors in your palette will be shifted to match the standard web colors from like 1985 (which are pretty ugly). You can avoid this option like the plague. Please.
(see image 11)
And, that's it! Not too bad right? If you're on another program other than Photoshop you'll probably have a "Save As" option and a gif file format. A lot of the features like palette type, colors amount, and dithering are pretty common across many programs so it should still be relevant. Certainly any
Results 1 to 1 of 1
Thread: ice bucket challenge badge
-
29-08-2014, 12:56 AM #1
 ice bucket challenge badge
Last edited by Bloop; 29-08-2014 at 01:05 AM.


 Reply With Quote
 Posting Permissions
- You may not post new threads
- You may not post replies
- You may not post attachments
- You may not edit your posts